Google Tag Manager is a script or tag management tool that allows the user to add marketing tags or snippets of codes on the website easily. GTM is free and you can try to learn without risking heavy amounts. In this blog post, you will learn how to set up Google Tag Manager, how to set up google analytics in tag manager, how to set up google tag manager in WordPress and much more.
Did you know that 25,400,558 live websites are using Google Tag Manager currently?
How to Set Up Facebook Pixel in Google Tag Manager?
In 2019, the only way to install Facebook Pixel via Google Tag Manager was by using a Custom HTML tag template. That means you need to know JavaScrip code in order to do that. However, now it is much easier and simple to add Facebook Pixel to Google Tag Manager.
- Log into your Google Tag Manager account.
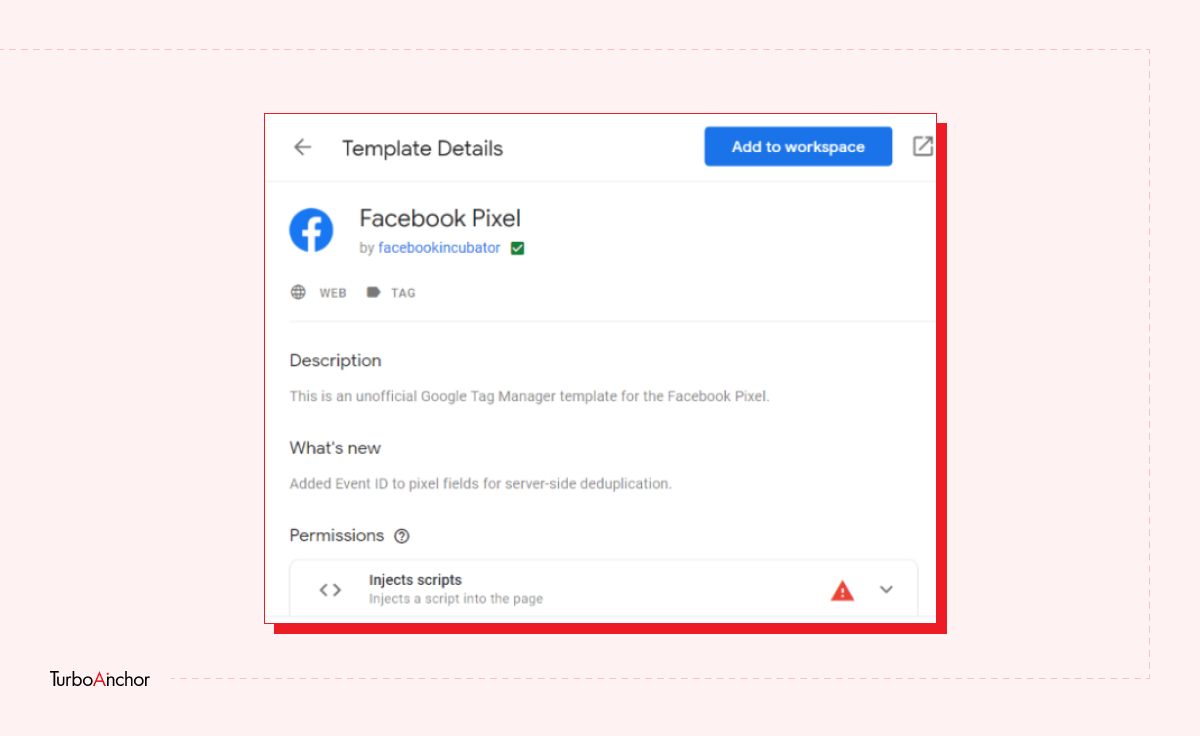
- In Google Tag Manager, go to Templates, click on Tag Templates and search for Search Gallery in the search field.
- Type in Facebook and then click on Facebook Pixel.
- You will see a new template: Tags>New>Custom section.
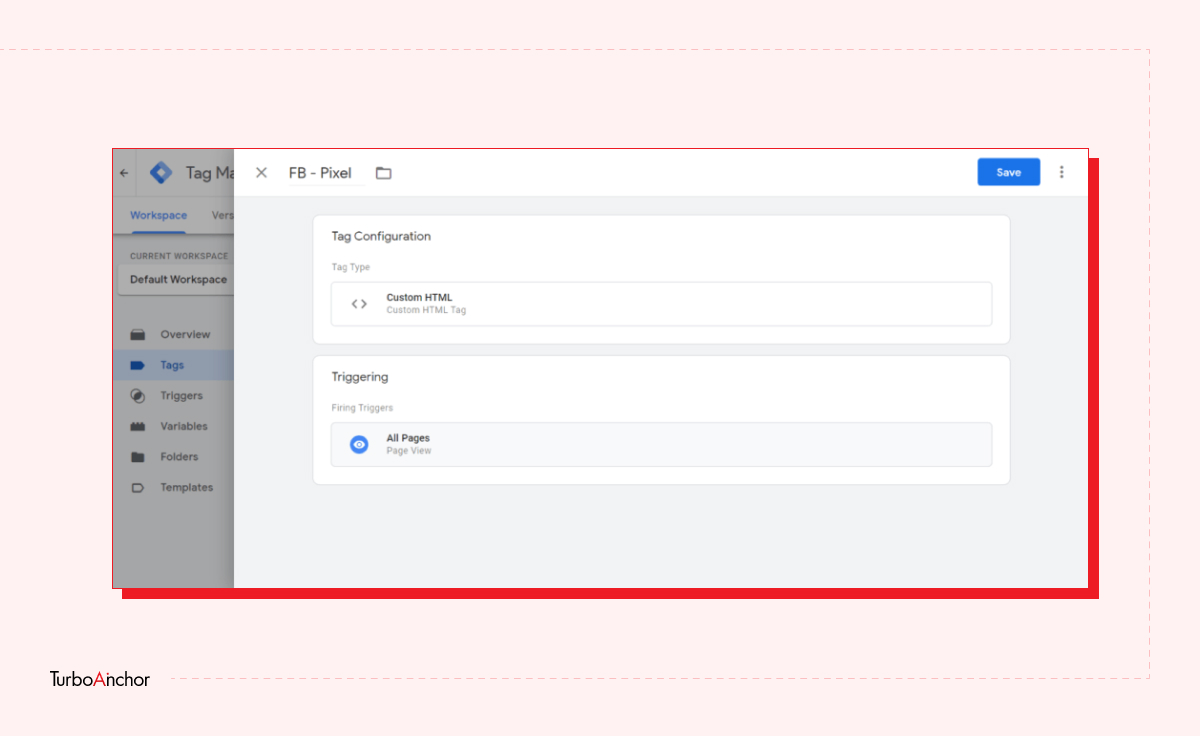
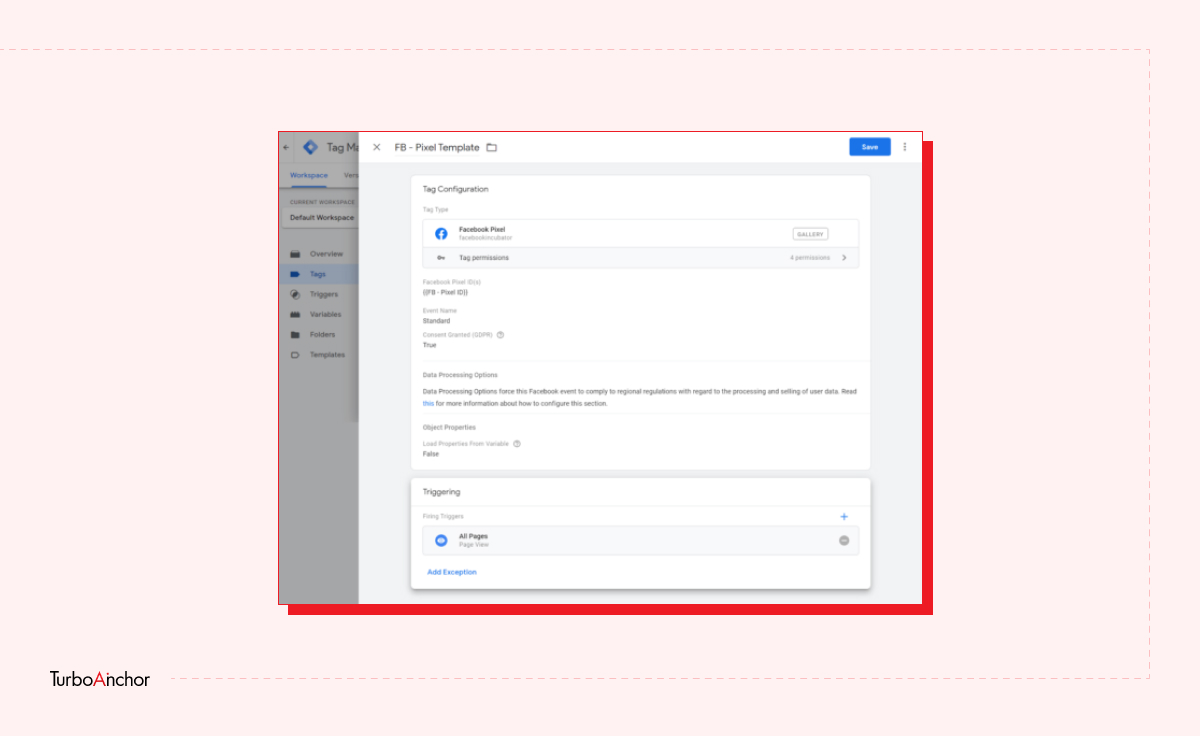
- On the Facebook Pixel – Pageview, enter the Pixel ID and set the tag to fire on All Pages under Triggering.
- Find and click Save located at the upper right corner.
- To make it more optimal, go to Variables, click on User-Defined Variables and then to Constant paste your Facebook Pixel ID. And save the variable. You can reuse that same variable every time you need it.
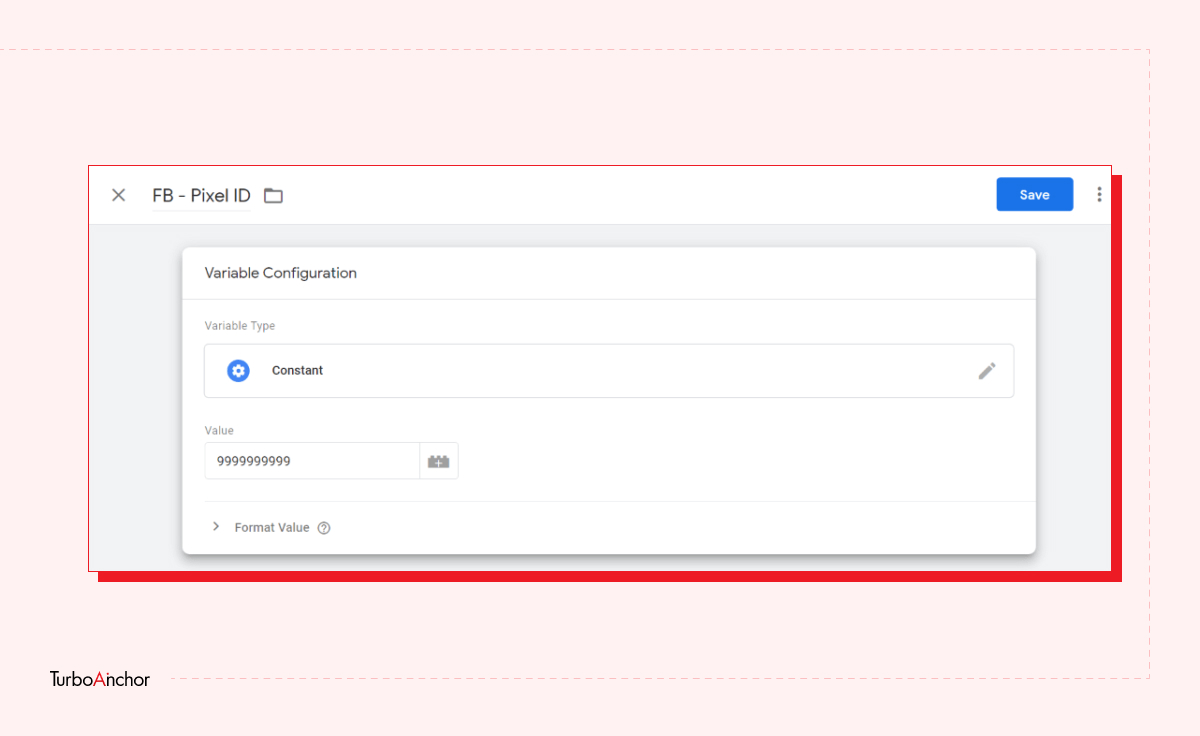
- Go to the Facebook Pixel-Pageview, and insert the variable you just created instead of the plain Pixel ID.
- To test the Facebook Pixel Tag, enable the Preview and Debug Mode, and refresh the page.
- Click on the Page View at the bottom of the screen to make sure your Facebook Pixel tag has fired.
How to Set up Facebook Pixel to Google Tag Manager Manually?
Follow the steps mentioned below to manually set up the Facebook Pixel to GTM.
- Log into your Google Tag Manager account.
- Click on the Tags and then click on New.
- Name your tag for instance Facebook-Pixel.
- Click on Custom HTML under the Tag Configuration.
- Paste the Facebook Pixel Code in the HTML box.
- Click on the All Pages trigger under the Trigger.
- Click on Save at the upper right corner of the screen.
How to Setup Google Tag Manager on Shopify?
Follow the step-by-step detailed guide to set up GTM on your Shopify store.
- Install GTM to get the code snippets, if you do not have Google Tag Manager installed, sign up for the GTM account and get the tracking code right away.
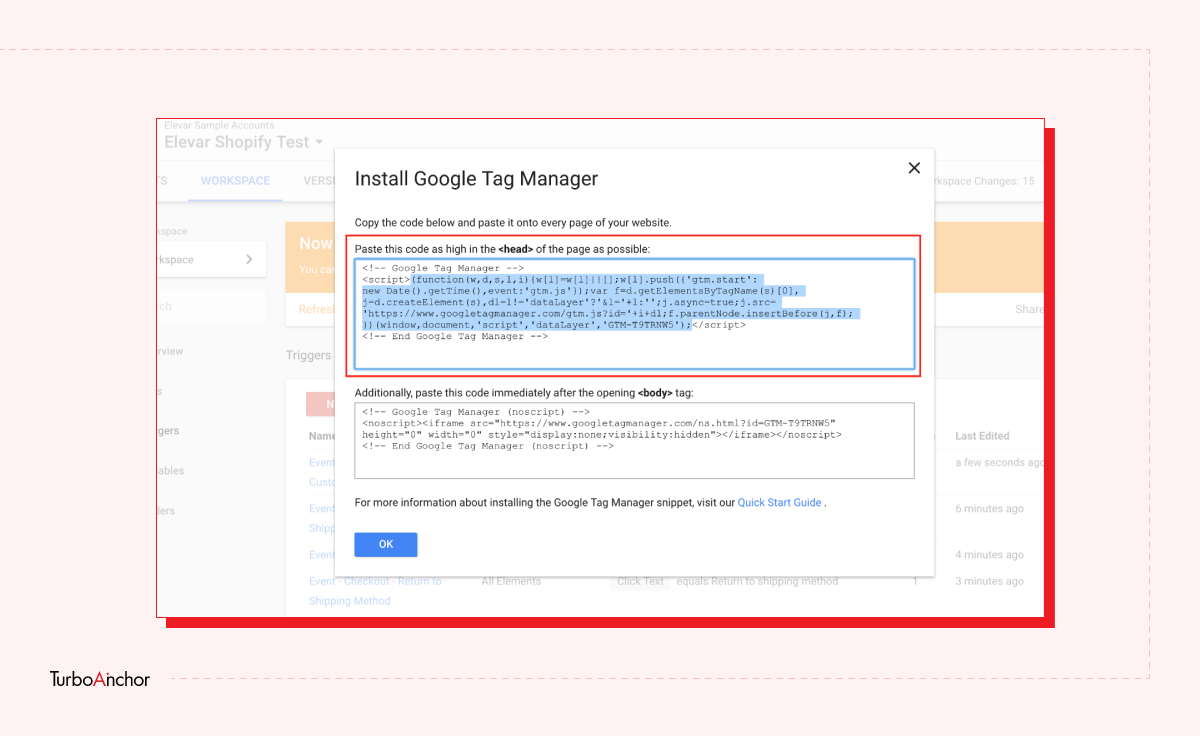
- If you already have the GTM account for your e-commerce store, you can find these code snippets by clicking on the Admin on the top navigation and then clicking on Install Google Manager.
- Copy the first piece of code snippet, copy everything between script tags and do not include the actual tag. If you are using the GTM for the first time, publish your GTM container by clicking on Submit and then Publish.
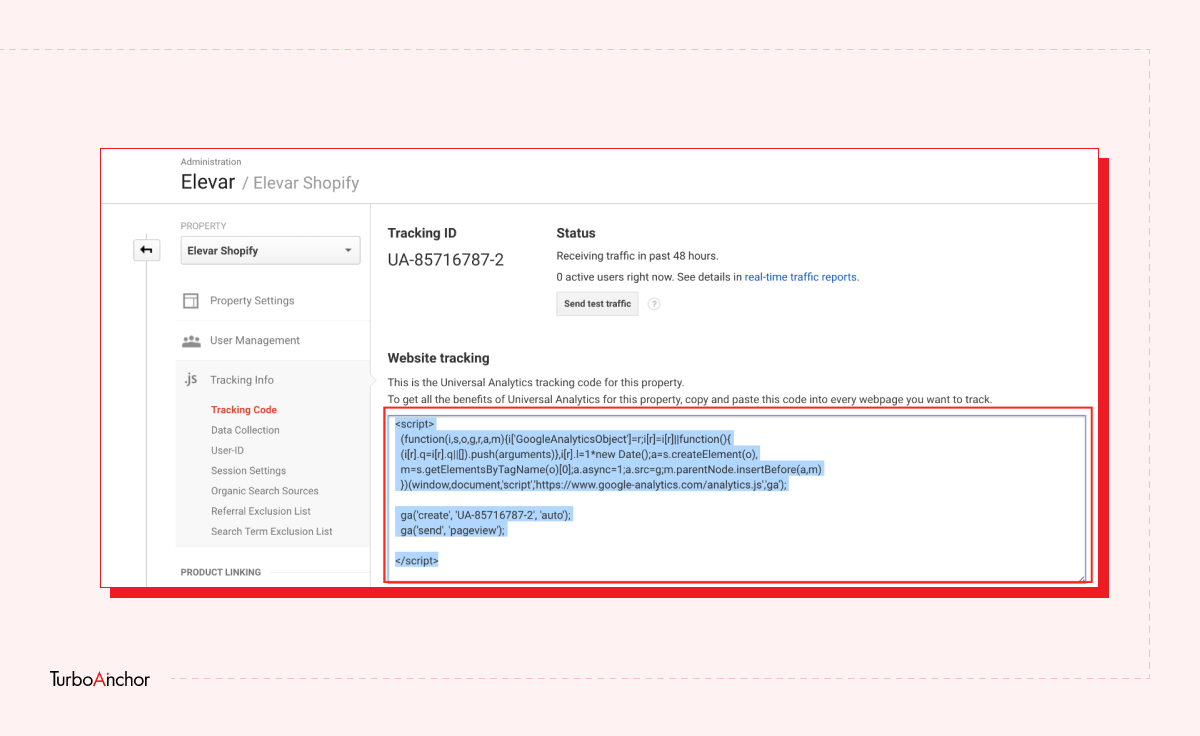
- Copy the tracking code as well. If you are using the GTM for the first time, publish your GTM container by clicking on Submit and then Publish.
- Now, login to your Shopify Store and click on Preferences under Online Store.
- Click on Add Custom JavaScript to Google Analytics.
- Paste the first piece of code and click on Save.
- Click on Themes under Online Store.
- Click on Actions and then Edit Code.
- In the search bar, look for “theme.liquid file”.
- Paste the first code snippet you got from GTM into the head tags of your theme.liquid file.
- Search for the “checkout.liquid” file on the search bar.
- Paste the first code snippet you got from GTM into the head tags of your checkout.liquid file.
- Similarly, paste the second code snippet in the body of your theme.liquid file.
- Paste the second code snippet in the body of your checkout.liquid file.
- Go to Shopify admin and click Save.
- Go back to GTM, and proceed to install the Google Tag Manager. Avoid adding the following types of tags during installation:
- Universal Analytics for Google Analytics
- Facebook Pixel
- Classic Google Analytics for Google Analytics
How to Setup UA in Google Tag Manager?
To deploy the Universal Analytics with Tag Manager follow the steps below:
- Go to Your Google Tag Manager and log in.
- Tap on Variables. You can find them at the left of the screen.
- Click New under User-defined Variables.
- Name your variable, for instance, Google Analytics – Universal Analytics Code.
- Select and add the “Google Analytics Settings” variable type.
- Select and add your Universal Analytics Tracking ID.
- You can enable different Google Analytics plugins under the More Settings dropdown.
- Click on Save in the upper right corner.
Add UA Tags to Google Tag Manager
- On the left side of the screen click on Tags, and then click on New.
- Name your tag such as Universal Analytics.
- Under Tag Configuration click on Google Analytics-Universal Analytics tag type.
- Select Page View under the Track Type.
- Select All Pages under the Triggering.
- Click on Save in the upper right corner.
- To make it Live on the website click on Submit in the upper right corner.
- And then click on Publish.
- You can also preview the changes using GTM Preview Mode.
How to Setup GA4 in Google Tag Manager?
- On the left side of the screen click on Tags, and then click on New.
- Name your tag such as GA4 Tags.
- Under Tag Configuration click on Google Analytics-GA4 Configuration tag type.
- Tap on Page View under the Track Type.
- Enter the Measurement ID.
- Click on the, Send a page view event when this configuration loads, checkbox.
- Tap All Pages under the Triggering.
- Click on Save at the upper right corner.
How to Setup Google Tag Manager in WordPress?
Set up Google Tag Manager in WordPress in these easy steps:
- Login to your Google Tag Manager account.
- Copy the code beside the Workspace Changes on your GTM homepage.
- Login to your WordPress account and navigate to Appearance and then click on Theme File Editor.
- Click on Theme Files on the right side.
- Click on header.php and paste the snippet code from GTM to the tags to change the header section.
- Paste the code to the tag as well.
- Click on the Update File at the bottom of the page to save changes.
- Once you’re finished with adding snippets to your WordPress website, go back to your Google Tag Manager dashboard and click Preview.
- It will direct you to a new window to connect Tag Assistant to your website. Enter your site URL and click Connect.
- A new window to your site will open, and Tag Assistant will notify you of the successful Google Tag Manager connection. Click Finish, navigate to the preview window, and click Continue.
- You will see the Google container found notification along with your Google Tag Manager container ID, meaning the installation of Google Tag Manager on your WordPress website is complete.
- Close the preview and click on Submit and then Publish.
Conclusion
Google Tag Manager is a tracking tool for managing and deploying the tags on your website. This article gives you detailed instructions on how to set up Google Tag Manager for different online platforms such as the Shopify store and WordPress. And two methods of setting up Facebook Pixel in GTM.
How to Setup Google Tag Manager? – Frequently Asked Questions
Where is Google Tag Manager ID?
In the Google Tag Section of Google Ads or Google Analytics account, the tag ID is displayed under the Google tag on the left side. A single tag can have multiple tag IDs. The first ID is the main ID, but the IDs can be used interchangeably when adding the Google tag to your website.
How do I know if Google Tag Manager is installed?
The easiest way to check if the GTM is installed is through the source code in the browser.
- Go to the website you want to check.
- Right-click on the background and a drop-down menu appears. Click on the View page source.
- A new tab will open. Press Ctrl+F, and it will open a search dialogue box.
- Type in gtm.js, if the GTM is installed, you will see at least one occurrence with gtm.js text surrounded by
Also Read:
References:
Google Tag Manager Usage Statistics – BuiltWith